
King Cake
During college I always received two king cakes, a cream cheese one from my dad and a plain one from my Aunt Cindy. One year by Mardi Gras day, the two king cakes were already consumed. and in 266 Ag Hall, where most of the best life choices were made, my friend, Christa, decided we would make one. I hesitated because King Cake was something bought, not made, but in her typical fashion she convinced me it would be easy. It was the first time either of us used yeast and killed it upon impact. The recipe was a little vague so Christa called her aunt who told us how to keep the yeast alive and happy.
Fast forward 5 years and my journey to seek out the perfect king cake recipe began 7,000 feet above sea level. For the next 7 years, I made as many king cakes as a working woman who spent her weekends skiing could possibly make. I researched recipes and techniques so much I got targeted ads for diabetic test strips, diabetic socks, and diabetic cookbooks. #TrueStory
Here’s the kicker. There are a zillion king cake styles and flavors so it’s not just about finding a good recipe, it’s about finding the right texture combined with the right balance of flavor to mimic my favorite childhood king cakes. — we ate plenty and I had my favorites. Here’s a king cake consumption chart for reference.
While I typically described king cakes to be a giant cinnamon roll, I soon found out that is not quite accurate. Cinnamon rolls miss some key flavor components that are in a king cake. Judy Walker, a Times Picayune/nola.com food writer taught me (via her recipe) the flavor profile I was going for and sweeter is not always better. Now to find the perfect amounts of cinnamon, nutmeg, and lemon zest.
I tried plenty actual king cake recipes and didn’t get the texture I wanted. After more research, I learned brioche was the way to go — something that seems so simple now was quite the discovery. Leave it to Mark Bittman in How to Cook Everything to have a fail proof brioche for a non-bread baker (at the time).
The last code (and the hardest) to crack was the icing. Almost all king cake glaze recipes are variations of a basic glaze recipe. The icing would crust but after it was enclosed, it would get wet and colors would bleed. I found one recipe that was quite a bit different, I can’t remember the blog I found it on that uses corn syrup in addition to powdered sugar and adds butter. Corn syrup is a key component to a better glaze texture and I think flavor (but not certain). I don’t care if you’re anti-corn syrup and will never use it again, buy a damn bottle for the king cake. You’ll eat food coloring and dare I say imitation vanilla too! My sister made the last tweak by subbing in buttermilk for regular milk. It does not taste exactly like bakery icing but there’s a good chance it’s even better.
True Confessions — I still enjoy making making king cakes (or really any bread) and I love eating them, but that adrenaline rush of “will this be it” is no longer there. I think a piece of me died with the success.
Disclaimer Only eat this cake between Jan. 6 and Mardi Gras day. You eat it outside of that window, and bad things will happen. This is 2021 — the world can’t handle more gris gris.
Cake Ingredients
4 c all purpose plus flour plus more as needed
1 tsp salt
1/4 c sugar
1/2 tsp cinnamon
1/2 tsp nutmeg
2.5 tsp lemon zest
1 Tbl instant yeast
1 stick (8 Tbl) butter — cold (cut in 16 pieces)
3 eggs
6.5 ounces buttermilk (or 1/3 c of Greek yogurt and 2/3 c whole milk)
1 Tbl vanilla
oil
Filling Ingredients
1/4 c dark brown sugar
1 Tbl cinnamon
1/2 tsp nutmeg
1 stick (8 Tbl) butter
Cake Directions
Combine 4 c flour, 1 tsp salt, 1/4 c sugar, 1/2 tsp cinnamon, 1/2 tsp nutmeg (if you modify the amounts make sure it’s equal amounts of cinnamon and nutmeg), and 2.5 tsp lemon zest in a food processor and process for 5 seconds or until evenly mixed. If you don’t have a large food processor (at least 6 cups), you’ll need to use a stand mixer with the dough hook. It will take a long time to knead in the mixer. See the note section for further details.
Add 8 Tbl cold butter and 3 eggs. Process for 15-20 seconds or until evenly mixed. Add 1 Tbl yeast.
Stir 6.5 ounces buttermilk and 1 Tbl vanilla into an easy to pour cup (like a liquid measuring cup).
With machine running, pour (don't drizzle) through feed tube. Process for about 30 seconds, then remove the cover. The dough should be very sticky and soft. If it is too dry, add buttermilk 1 Tbl at a time and process 5 - 10 sec after each addition. If it is too wet, which is almost impossible, add another tablespoon or two of flour and process briefly. If you aren’t familiar with brioche dough, don’t add additional liquid.
Keep processing it until the dough is smooth and silky. Unplug the machine and pull a piece of dough with your hand. It’ll be stretchy and you should be able to see light through it. I won’t give a time because it depends on the strength of the motor and what speed you’re using. Count on it being at least a couple of minutes.
Coat a large bowl with oil. Use a rubber spatula to scoop the dough into the bowl. Roll the dough in the oil (dough should be too loose to have a tight ball shape). Let rise for 2-3 hours or until triple in size or refrigerate overnight. When you press on the dough, you should here a sigh as it starts to deflate. That is when it is ready.
Lightly oil a flat surface. Place the dough on the surface and lightly oil the top of the dough. Pat dough into a rectangle (this will help the dough to have a uniform shape later). Use a rolling pin and roll into a large rectangle. Roll the dough from the inside (middle) out to about 24“ x 12”
Cut three equal strips along the long edge. I use a dough cutter for this step, but a sharp knife will also do the trick (depending on the surface you're using, you can use sharp scissors so you don’t cut the counter). Use 1 stick of softened butter and coat the top of the strips. Leave 1/4 " strip bare on the far long side of each strip. You'll need a "dry side" for the dough to stick after rolling.
In a saucer, mix 1/4 c of brown sugar, 1 Tbl of cinnamon, and 1/2 tsp of nutmeg. Evenly distribute the mixture on the dough -- leave the dry end with no sugar mixture.
Begin the roll with the long buttered edge — you’ll want long, thin strips. If it's sticking to the surface, use a dough scraper/ dull edge of a butter knife) to help it unstick. Pinch the edge of the roll to seal (might need a little water to help stick). You'll want a good seam so it doesn't leak during baking. Roll the strip so the seam is on the bottom. If you used flour (I didn’t tell you to!) instead of oil and the dough feels dry or has "flour dust" dip your finger in water and run it across the dough. Cut the ends off of each tube off so you have straight edges. Bake the ends as “bites”.
Braid the three pieces and form into an oval. Pinch the edges together (might need a little water). Transfer the circle to ungreased parchment paper. You can help loosen the dough with the dough scraper. Reconnect the edges of the dough after it's transferred if needed. Loosely cover with plastic and place in a warm place for 1 hour or until it 1 1/2 until more than doubles in size. It is hard to tell when the dough is ready for baking by size alone. Gently press the dough with your index center about a 1/3” deep. If it immediately bounces back, keep letting it rise. It’s ready when the dough indent slowly fills in. If the dent doesn’t fill in, your dough is over proofed.
Heat oven with a pizza stone to 350 degrees. Slide the parchment onto the stone using a cookie sheet as a paddle. Cook for 15 minutes. Rotate the dough and bake for 5 minutes. It should be golden in color, but still feel soft.
Glaze the cooled cake.
Glaze Ingredients
1.5 Tbl butter
1.5 Tbl corn syrup
1/4 tsp salt
2.5 c powdered sugar
1 tsp clear imitation vanilla
3.5 Tbl buttermilk room temperature (1 Tbl Greek yogurt and 2 Tbl milk)
purple, green, yellow food coloring
Glaze Directions
Melt 1.5 Tbl butter. Stir in 1.5 Tbl corn syrup, 1/4 tsp salt, 2.5 c powdered sugar, 1 tsp clear vanilla, and 3.5 Tbl buttermilk. Add more milk or powdered sugar to the consistency you like. If the icing starts to harden, pop it in the microwave a few seconds.
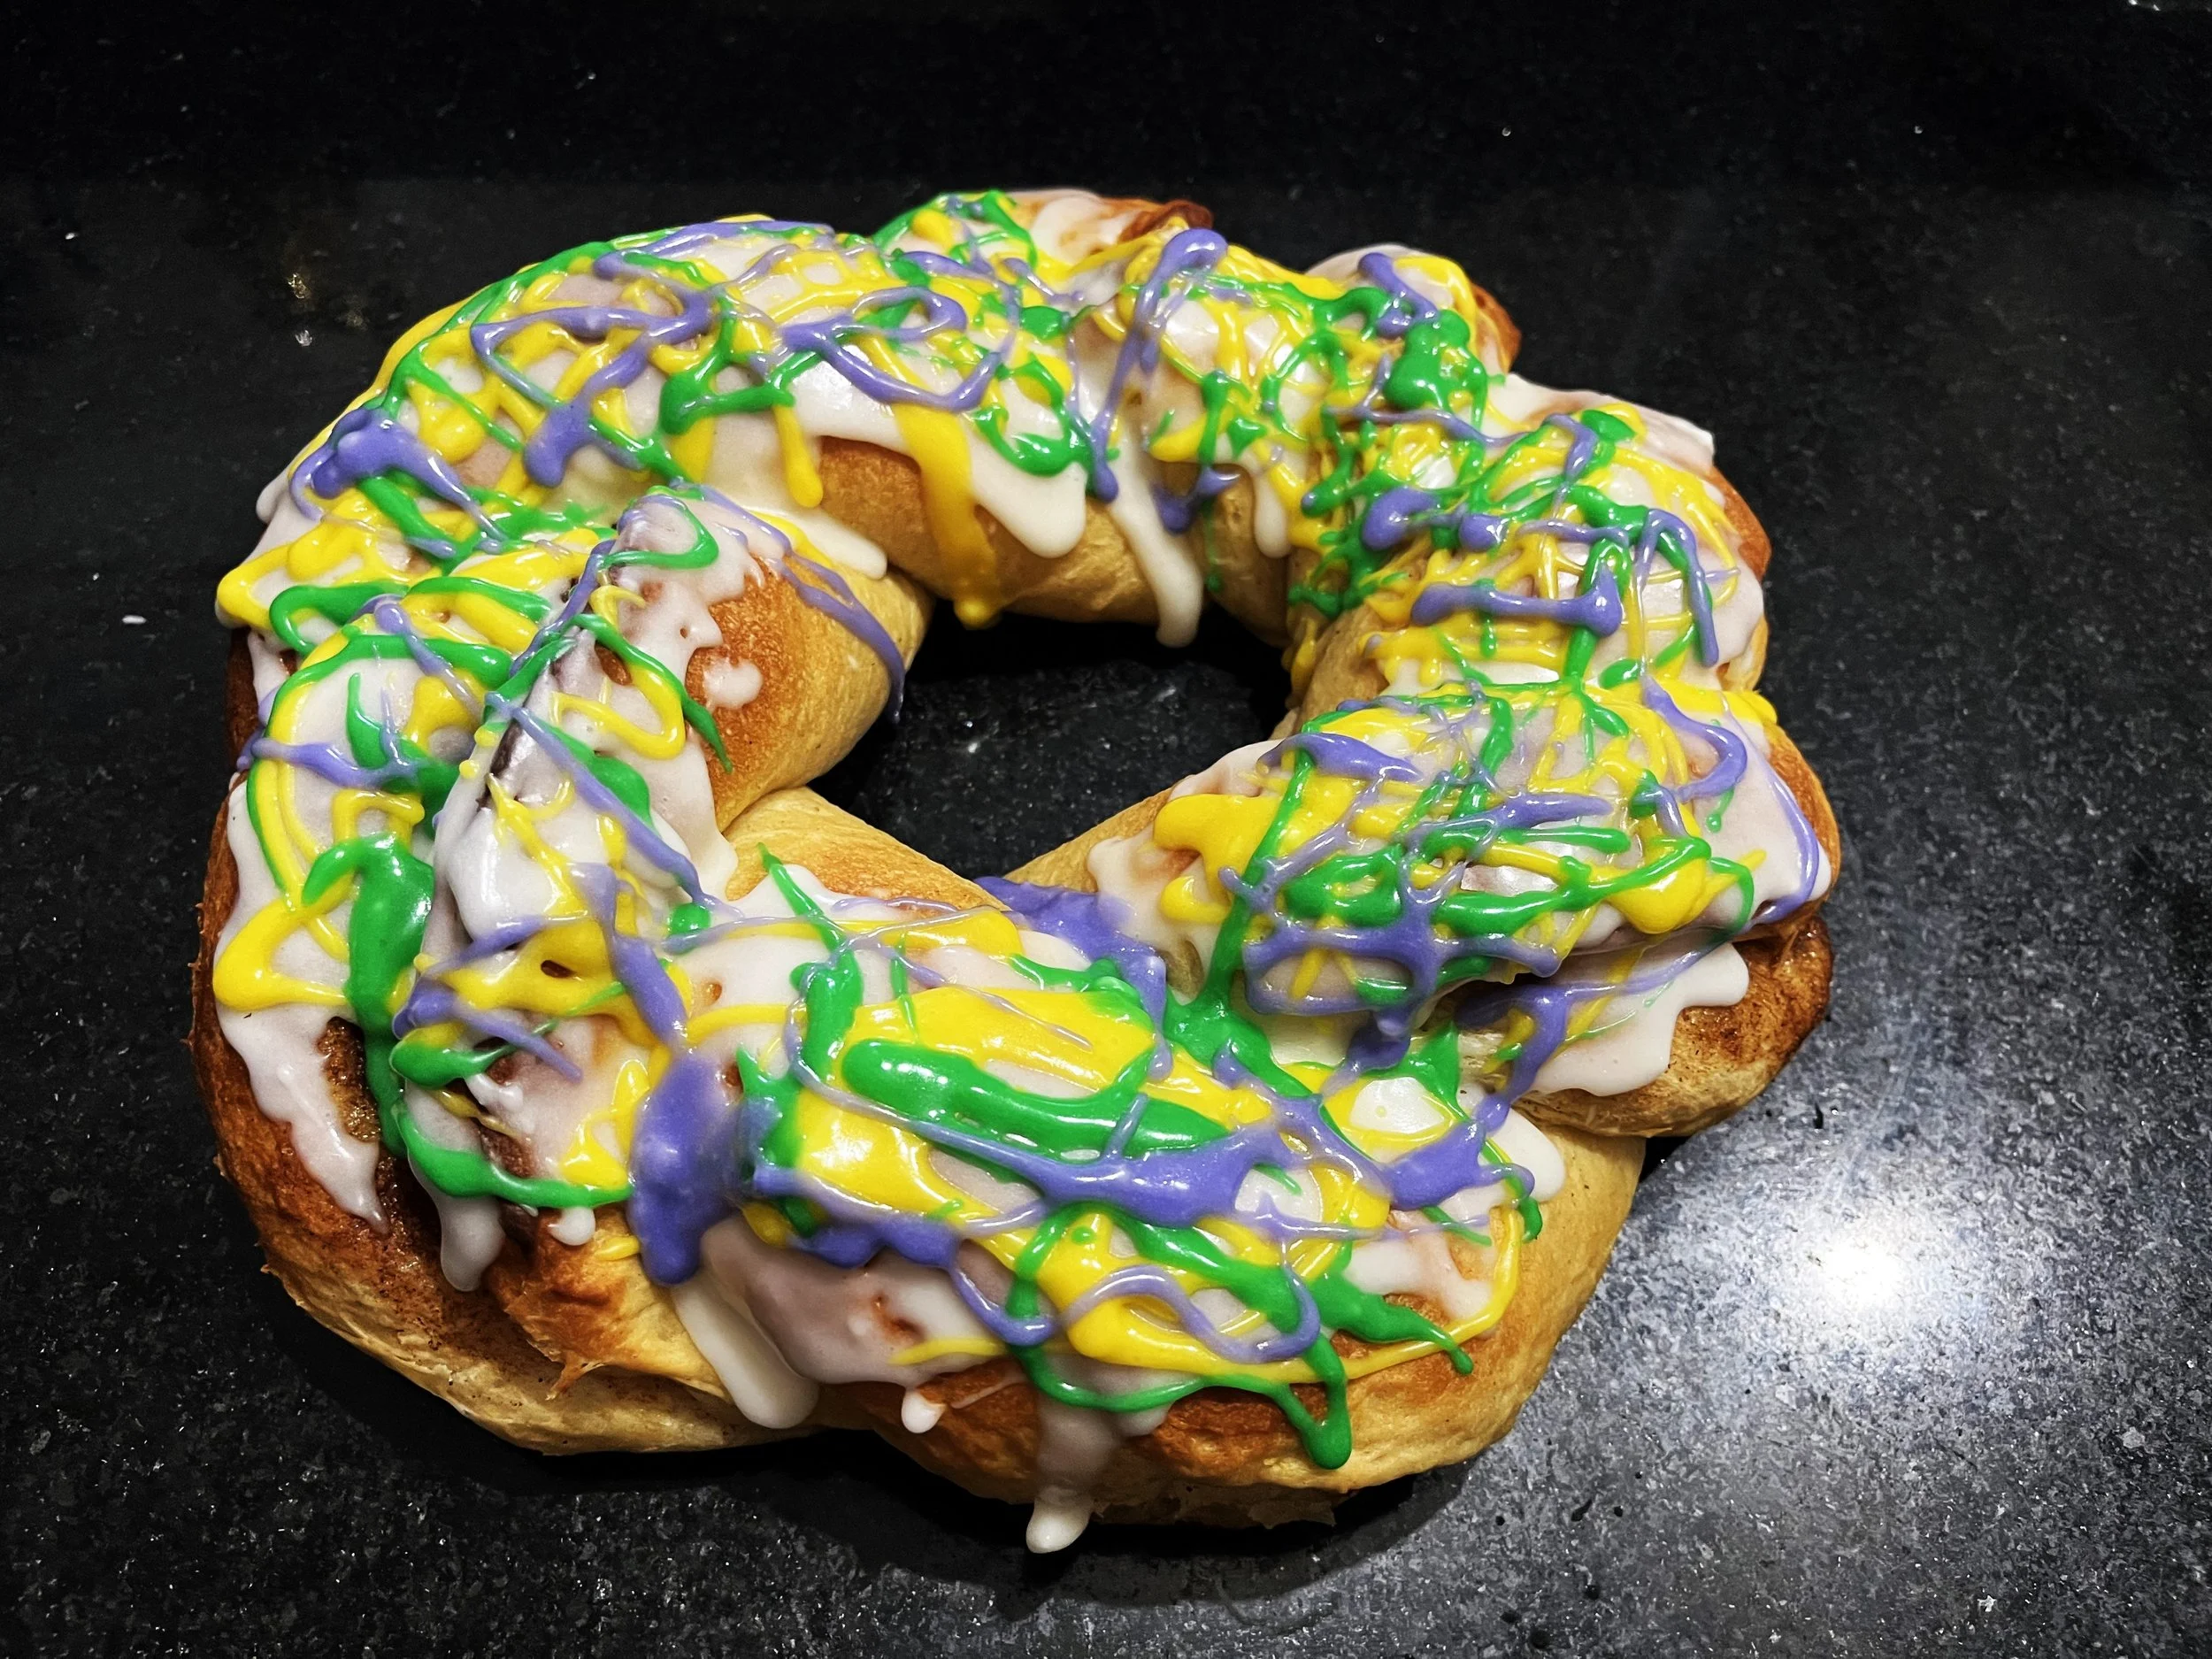
Put a thin coating of icing on the cake. Divide the remaining icing unevenly into three bowls. The bowl with the most icing color will be yellow, The medium amount of icing will be green. The smallest amount will be purple. Drizzle yellow icing first. Allow to dry. Repeat with green icing then purple icing. You may need to pop the icing in the microwave for a few seconds to thin it. You can also layer the icing when wet and it gives it a more flowy look.
Notes
If you aren’t used to shaping wet dough, I recommend using 1/3 c of Greek yogurt and 2/3 of whole milk in place of buttermilk. It will yield a drier dough which makes it easier to work with especially when it comes to shaping.
To mix in a stand mixer, add all ingredients to the bowl. Turn the mixer on low. Once everything is incorporated, you can turn up the speed. Mixers have different strengths of mixing. It is safe to say don’t go higher than medium. Your dough will start our shaggy, then it will look rough. It will start smoothing out and come away from the sides of the bowl. After the sides of the bowl are clean, your dough should be smooth and silky. Take a small piece and press it between your fingers than stretch it out. The dough should be quite elastic and see light through it. That’s called the windowpane test and your dough is ready when it passes the test.
If you need a warm spot, you can preheat your oven to 150 degrees before you make the dough. Turn the oven off when you begin mixing the dough. By the time you finish mixing the dough and open the oven, the oven would have cooled enough that it won't kill the yeast. You can only use this trick for the first rise. Second rise, just put it on the counter next to the oven.
Icing — I battled icing color for years. I like real vanilla which is dark. I tried the opposite side of the color technique trick and didn’t have much luck and didn’t have the patience to keep trying. My mom told me to use clear imitation vanilla because there was so much flavor going on, I wouldn’t notice a difference. This is coming from the woman who goes to great lengths to always have real vanilla in her pantry. I gave it a try and she was right. I recently learned about white food coloring, but haven’t tested that to comment if it works when you add color on top of the white.
This recipe makes a fairly large cake., but you can make to half-size cakes. Roll the dough to 18“ by 14”. Cut into four strips and twist (instead of braiding) two pieces at a time to form two circles.
You can make the cake ahead of time. Wrap the cooked cake in 3 layers of Saran wrap followed by foil. Freeze. When you’re ready to eat it, put it on the counter and bring it to room temperature. Glaze it.
If your cake is not airy, it means you didn’t let it proof long enough. The dough does what the dough does so listen to the dough and not the clock. It will tell you when it’s ready to be baked. Another reason your cake will be heavy is because it didn’t cook long enough or it over proofed. If you have space between the crust and crumb, it is over proofed.
If you over proof it, which most likely happen if you bake enough bread. If you’re like me, you’ll push the envelope to get as much rise as possible and sometimes, you lose. It’s ok. Move on. With typical bread, you can punch it down, reshape it, and let it rise again. This is a filled bread, and I haven’t had to do it on this type of bread. This strategy is untested with king caked, but try gently pressing down on the dough while leaving it shaped. My guess is the braid will probably somewhat mesh together, but will mostly stay intact. Once you have icing on it, no one will know.
If your cake is dry, you baked it too long.
If your cake splits. Don’t worry about it. Icing hides it.